Friday, November 2, 2012

Mirror mirror on the wall...

Yesterday was a very good furniture hunting day! I picked up 3 mirrors and a small square wood and leather top folding table for $20. I wasn't sure when I decided to go see the mirrors, what condition they were in.. in fact, from the Craig's list picture, one of the mirrors looked like the cheap gloden color aluminum framed mirrors..
But the curvy frame of the leftmost mirror had caught my eye. So I decided to go anyways. Also, it was not very far from my place, and I thought, $20 might not be too bad for the two wooden ones, and I can always donate off the ugly one.

As it turns out, they are not as small as they look in the picture, and the golden one is actually yellowish wood with a small shelf that can be installed underneath.

The table is in pretty good condition as well, and very very interesting in terms of its folding legs.

The smaller wooden colored mirror is also pretty nice.

And of course, the curvy one has to be my favorite. It is in a very very good condition with not even nicks or marks on it. the bottom design is in a pretty good shape as well..

I was trying to find out how much these mirrors are worth, and look what I found on ebay..
"MAHOGANY DREXEL BEDROOM DESIGNER MIRROR CHIPPENDALE" ... $350!!

Wednesday, September 19, 2012

Fabulous thrift store vases!

For some reason I got super inspired and went to a local Goodwill store 10 minutes before they closed.
The goal, find great looking decorations for the soon to be completed dresser 2.1 which will be the new TV table.

I wasn't very hopeful, but when I saw these vases, I got so excited, I had to run to the next door bank to get cash.

At over a foot tall, these look awesome after cleaning. And the bonus, the little France made crystal vase I found for $3!

Saturday, June 16, 2012

"Let there be lawn", she said.

Well, "she", as in I, said that a few weeks ago. The ugliness of my front yard, or should I say a place where wood chipper threw up, was becoming even more apparent now as the neighbor's lawn are all nice and green after the April and May showers! Well, it was a patch that should have had lawn, as all of the other 5 neighbors have it. And this being a condo, I do not know why we were the only people with the whole patch covered in ugly wood chips!
It was looking so ugly, that I guess, I didn't even bother to take any long shots of it.

When J was here 2 weeks ago week, it was decided that we should ask the condo sectretory that I would like to have a lawn too.. And he agreed, however, the outside maintenance guy told me that he will not be able to get to it any time soon.

I asked him again last weekend, and he told me that he won't get to it for atleast next two weeks... and he was planning on putting down grass seed and I was supposed to make it sprout by watering it! So, anyone who knows about my green thumb, or lack thereof, would know how sure I was that at this rate, I will not have any lawn this year!

Finally, this morning, after having to fish out some animal's poop from Bella's mouth, (something keeps on digging in my front yard and leaving me special gifts for busy mornings!), I decided to do it myself!

So I borrowed my neighbor's rake, and raked off the wood chips...
So much improvement already, don't you think?

 Then, a little later in the afternoon, it came to me... rolled grass! I had seen it on a TV show and noticed it a few weeks ago in Homedepot. But it was not in the store that is close to me, but it was at a farther one! Who cares? I was all geared up. I measured my yard.. 20ft x 8.5ft, then called the store for price! As it turn out, it is not called "rolled lawn", its called "sod". And it was under $5 for a 5ft x 2ft section! Not bad, huh?

The only problem was, there was no way it was going to fit in the car!!!
So two trips, two hours, a half broken back and a dirt covered car later, the sod pieces were in my yard!
Then I had to start laying down the pieces and adjusting them. It was harder than I thought, especially because of the steep incline of my yard! I am pretty sure, I was supposed to water the ground and lay down more top soil, before the sod, but I had no energy left, and I knew, if either of those things make the slope slippery, I will not be able to continue.. so hope that the little layer of dirt the sod came with is sufficient.
The thing I did do, was to spread the nematode mix on the ground, before unrolling the pieces. These are supposed to be worms, which will kill harmful grubs and even ticks! Let's hope it works.

And there it is!
I laid down my soaker hose, and got completely soaked trying to adjust it to not soak the side walk.. But it did anyways..
And here is the top view!! Can't wait for tomorrow to take some daytime pictures :)

Time requirements:
Raking and removing small amount of weeds: 1.5 hours
Sod pickup: 2 hours
Laying down and spreading the sod: 1hr 15 mins or so
Cleaning the car: 20 mins

Not bad for a day's work.

------------Day time-------------------
How beautiful do the plants look with the green border!
And the hostas are flowering :)
And my little annual garden looks beautiful!!!
Hallooooo Summer~~~~~

Monday, May 21, 2012

Dresser 1

I just love ReStore. It not just carries interesting old furniture, but it also builds houses for low income people with the money they make. I make frequent rounds of this store since it is super close to my house ever since I found out about it.

On one of my visits, I found a small dresser. It was the perfect size that it would fit on the wall next to my patio door without blocking it and would provide me with the extra drawer space I am missing in my small kitchen.

This is how you see it when it is against the wall.
Next to my $6 shoe stool I made, again from some frugal finds from ReStore!
 Which is the perfect size for my very small and narrow hallway! :) Happiness!!!
Lessons learnt:
1. Always make sure that the drawers slide well before purchasing a piece of furniture.
2. Paint on a warm day. The reason I needed 5 coats is first I painted in winter and the paint never really dried well.. ever.
3. Use the flat top stencil sponge brush for stenciling.. nothing else works as well.

Update Aug 21, 2012:
 After having the dresser and the stool in the space for some time, I realized that it wasn't working in that space.
So I sold the dresser today for $75. It was a lot of work putting in those slides, but I hope the boy who's TV is going to be on top of it enjoys it as much as I did. It will be replaced by a smaller shelf I have.
The stool is in the first floor hallway. I think it is better there as the tall boots can reside there under it and that is where they should be taken off given the amount of dirt we end up dragging in in the winter months with them.

Thursday, May 17, 2012

Sewing machine cabinet

Sewing has always been this thing in the background for me, that my Mom and Aunt always did, I always wanted to try but thought was completely out of my skill set and patience level! However, as soon as started my Ph.D. and started getting a stipend, sewing machine was one of the first things I purchased, along with camera Olympus c-725 in 2004!
As soon I got my sewing machine, I did a few projects the following year, but soon gave up as it was a big hassle getting the machine out of the box every time and putting away every time. And when I moved in to the Hackfeld house in 2007, it just stayed in the box for the next 5 years, until I recently took it out to make a birthday present for my niece.
But now that it was out, I did not want to put it back, and just in time, I saw an ad for a free sewing machine cabinet/table on Craig's list. The ad said that it has been sitting outside in the rain and needs to be refinished, and the picture looked liked one of the drawers might be falling off. However, the idea of a separate table for the sewing machine sounded really good and I decided to get it against my friend Tess's advice.
 Then, I had to drive around with the cabinet in my car till Tess had time to help me get it out as J is back in SJ!
The day I got it out of the car, the rain had stopped for a short time and some bumble bees that had taken shelter in the cabinet were now swarming my car!!! Actually, there were only 3 and it was not so bad once they were out of my car.
As it turns out, the broken drawer, was actually not a drawer at all, but a door and the hinges need to be fixed.. not too bad. And the rest of the drawers, though not modern, are pretty smooth. Additionaly there is a compartment on top, that is supposed to hold the sewing machine while you sew so that the sewing surface is at the same level as the table top, and when you are done, you put the machine away in the little area behind the door!
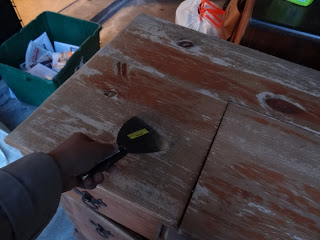
 So far I have scraped away the peeling poly from the surface with a scraper and its waiting for more work!

May 20, 2011
The scraping was not enough, so I took the hand sander given to me by the "Wood Chuck and Wood Chick" and I sanded this baby down for hours!!!
4 hours (ofcourse with breaks) and five 120 grid hook-and-loop sand paper sheets later, this is what I have.
I filled smaller dings with wood-putty, but I have to still figure out what to do about the huge gaps in the bottom moldings. I have tried hammering it in, but nails on some of the have come loose and I think some of them are even warped, so that if I hammer it in on one side, it comes out on the other.
------Update------- 
Finally, J was here after a long time! With his India trip and a short last visit, we had not had time for any projects together in almost two months. But this time he was here for almost 10 days, and we were able to get on with this project.

This is after staining with water based stain. I will try to take a better picture later. But here it is for now. I am also planning to stencil a sewing proverb and a picture of sewing basics on top. Can't decide if I should go with silver for contrast, or gold as the hardware is bronze..

Dresser 2.1 and 2.2

I am not sure if its the result of the current economic depression or people are just getting a creative kick, internet is swarming with pictures of old dressers converted into TV tables. May be its just me that I have started looking into these things I didn't as I have graduated and do not work every waking moment of my life.
So I decided that that is what I want for my TV table as well. Currently I have a small black basic TV table given to me by my cousin. It has worked just fine for me so far. But it is very plain, black and very uninteresting. I love the pieces from this online shop called One Kings Lane. However, I do not think I will ever be able to afford to shop there as this little piece costs like $300.
Aurelia Cabinet
And then I saw a post for a free one on Craig's list on the same weekend that J was here.. Perfect! Because you know, I can't really pick them up by myself, and even if the previous owner helps me get it into my car, I usually can't take it out of the car!

So we went and got this one. Which seems like it has been out on the guy's deck for a few weeks!
Dresser 2.1
I brought it home and sprayed it well with the mold remover and blocker, which I had handy because of the leak problem I had in the house previously! And then I noticed a few things I had not noticed before, the dresser is kind of sagging in the middle, the drawers are old center glide ones and all of the glides are missing.. and the sagging has caused a huge crack on the top! But it was already in my garage.

As we were bringing this one in, I had noticed another dresser sitting on a curb very close to my house! So I begged J that we go and look at it. As it turns out, it is actually in a much much better condition than the 2.1. The glides are all present and there is no mold!

Dresser 2.2
So then I changed my plan to make this the TV table, and make the other one into....... well, something else!

However, now I am thinking that since I need more of just a cabinet with drawers and not drawers in my TV cabinet for the VCR/DVD player and cable modem, router and Wii, May be I should go back to my first plan. That would mean I will convert Dresser 2.1 completely (or mostly) into cabinet with the drawer fronts as doors, and dresser 2.2 will stay a pretty dresser in my bed room, I currently I use plastic drawers for my things!

Will see, for now they are both sitting in my garage along with D3 and the sewing machine cabinet!

Update Aug 22, 2012:
And the tables sat in the garage the whole of summer!! I wasn't able to get to them at all with all the other projects we have been doing around the house.

After selling D1, I am into a cleanup mode for my garage.. My Mom and Dad are visiting me in a couple of months. I know, my Mom is going to have a heart attack, if she sees it in the condition it is in currently. So D2.2 got donated to ReStore. I don't feel bad about it as I had gotten it for free any ways.. And if you remember how hard it was doing the slides on D1, you will agree with me that I was really not looking forward to redoing all the slides on this one.. Even though the drawers had these beautiful dovetail construction and beautiful hardware, all the drawer slides were missing and the top was slightly sagging.. which meant, I would have to do a lot of manipulation to make this one work! So its gone.

Still have my D2.2 and it is going to become the TV cabinet with the middle drawer in the middle row being a shelf with mesh inset similar to the one done by Marti from Project Palermo for DVD player, wireless router and in space permits Wii.
Ofcourse, this  is prompted partially by the need to house all these things that need IR remote access, and partially by the fact that I am missing one drawer pull and finding it very hard to get a matching one.

Again, the dresser waits its turn!

Tuesday, May 15, 2012

Dresser 3

So I recently snagged my latest dresser that I am going to call Dresser #3 or D3 for short. It is this beautiful Bombe Chest look alike piece that Agnes, a cute little 70 something sweetheart, sold me for $30.


Craigslist photo, which I think her daughter took.

Even though the ad did say, some chips and nicks, and I could not tell if the left corner was just camera overexposure or the entire corner was missing, I had to have it! And for $30, one can't go wrong. One thing I couldn't tell from this photo was, how bad the damage was and how old the dresser actually was.

Though the idea of getting an antique for $30 sounds great, in reality older furniture comes with its own set of problems like the dresser 1. Which translates into a lot of time, energy and money and given that I am the only one doing these projects, no guaranties that you will have what you wanted in terms of functionality in the end.

 When I actually got to Agnes's place, I found this beauty, with some of the veneer chipping here and there.

I open the drawers, and voila.. smooth glides!


I couldn't have been happier. So I paid Agnes right on the spot, picked up the drawers and told her I will be back next week to pick up the cabinet with my friend (it is heavy). That day happened to be today! :D

SO now that this baby is in my house, all I need to do is figure out how I am going to refinish it, and whether it is going to replace D1 as buffet, or going to replace the plastic drawers sitting in my bedroom!

Here are the options I am thinking about!
or English Garden Four Drawer Bombe Chest